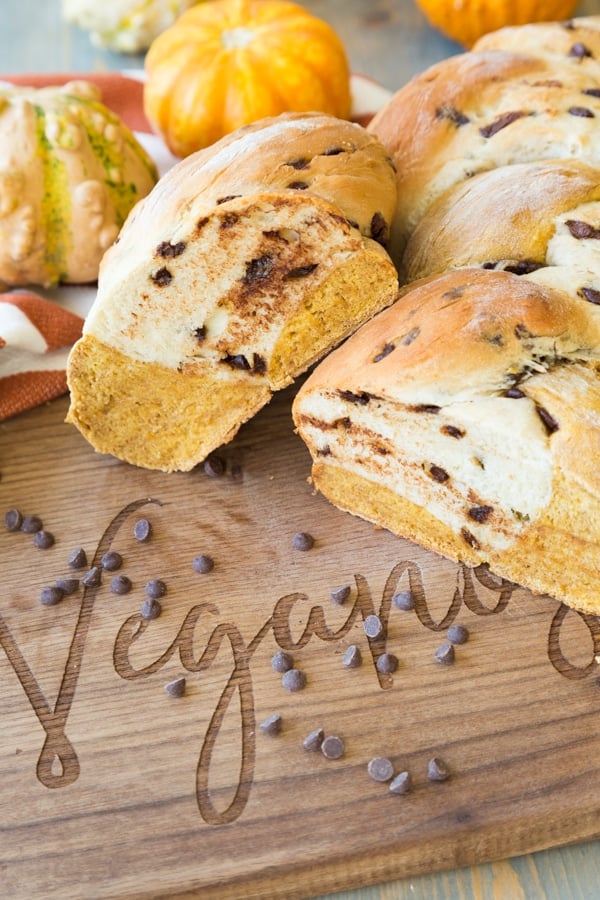
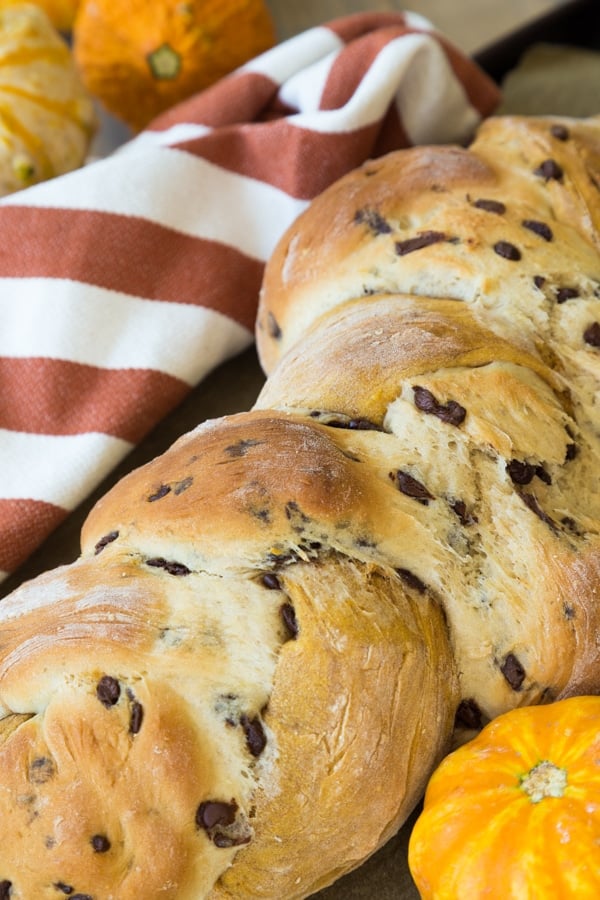
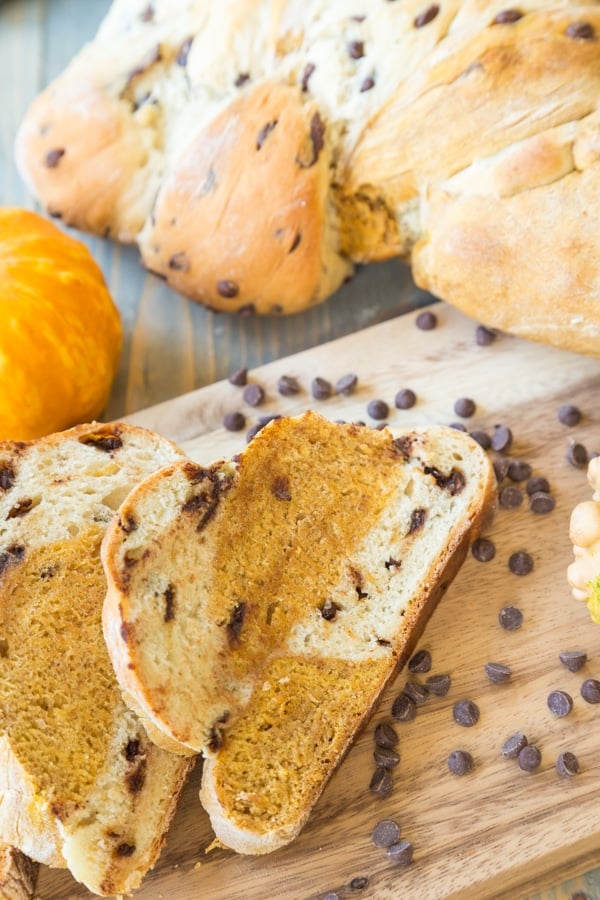
Swirls of Pumpkin combined with vanilla chocolate chip dough to make a seriously delicious sweet bread. Use our Pumpkin Vanilla Chocolate Chip Braided Bread to make a cinnamon sugar toast, French toast, or even just eat it plain! It’s the perfect way to start a crisp Fall morning.
The History of Pumpkin Chocolate Chip Braided Bread
This pumpkin bread recipe has been waiting to make its debut since last February, In the darkest days of winter, I found myself craving something warm, comforting, and full of pumpkin.
Unfortunately, people had moved on from pumpkin, as Thanksgiving was long gone. However, I still had a few cans of pureed pumpkin left over from fall, so into the kitchen I went to make something delicious.
Instead of making a traditional pumpkin dish, I decided to make a loaf of bread. I mean, is there anything more cozy and comforting than the aroma of baking bread?
The recipe was inspired by garlic bread knots that I made the week before. I had some active dry yeast left over from the knots, so it seemed only natural to use it up and make a sweet rising bread.
I took my classic bread recipe and added pumpkin and chocolate-chips. I also made it look really pretty. Instead of putting the dough into a typical bread pan, I rolled three pieces into ropes and twisted them together. It was so easy and the results were fabulous.
THE RIGHT TYPE OF FLOUR AND YEAST ARE IMPORTANT DETAILS FOR MAKING BREAD
Choosing the Correct Flour
The flour you choose for baking cakes, cookies, and bread will make a difference in the end result. For this recipe, I chose bread flour.
I could have used all-purpose flour, but I wanted something that would rise well and yield a strong dough for kneading and twisting. It also produces a nice chew, which is what you're looking for in a good bread. Read more about different types of flour, here.
Why is Yeast Important to Make Bread?
Active Dry Yeast is the ingredient that makes the bread rise. Is it absolutely necessary to bloom or proof yeast before making your dough? Not necessarily according to this article. But, I always proof my yeast to make sure it is still alive. If after ten to fifteen minutes your yeast hasn’t begun to bubble, it means that your yeast is dead and you need to start over. A dead yeast will not help your bread rise at all.
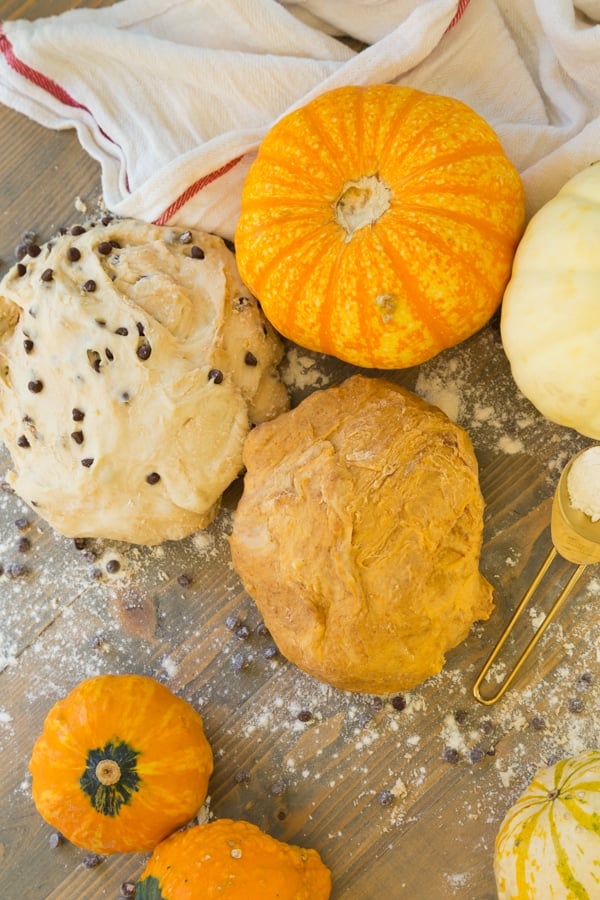
Considering you have your two most important pieces of information stored away now, you can begin making your bread. Make sure to follow the directions and critically consider the texture of your dough. If your dough doesn’t look like ours does in the photos, feel free to continue to add flour at 1 tablespoon increments until it matches. If the dough is too wet it won’t bake correctly.
HOW TO MAKE HOMEMADE RISING PUMPKIN BREAD WITH YEAST
STEP ONE:
Proof the yeast. That means that you combine the yeast, 1 tablespoon (15 g) sugar, and the warm water in a small bowl and let it sit until it bubbles. This takes about 10 minutes.
STEP TWO:
In a large mixing bowl, slowly add the flour to the sugar and whisk it together until fully combined. By adding the flour a half of a cup at a time you'll ensure that it's fully combined with the sugar.
STEP THREE:
Make a well in the center of the flour and add the yeast mixture. Stir until it turns into a sticky dough. Now, put one third of the dough in a separate bowl and add the pumpkin puree, salt, and pumpkin pie spice and stir well to combine.
STEP FOUR:
With the dough hook attachment, mix the vanilla and chocolate chips into the remaining dough and blend until the chocolate chips are fully incorporated.
STEP FIVE:
On a smooth floured surface, knead the pumpkin dough until you can form it into a firm ball. Add a small amount of flour if it's too sticky. Kneading the dough will firm it up, so don't add too much flour, just keep kneading it. Repeat with the vanilla-chocolate chip dough.
STEP SIX:
Form the two balls of dough into balls and place in a lightly greased bowl and cover with a towel. Let them sit in a warm spot for forty minutes. The dough should double in size.
STEP SEVEN:
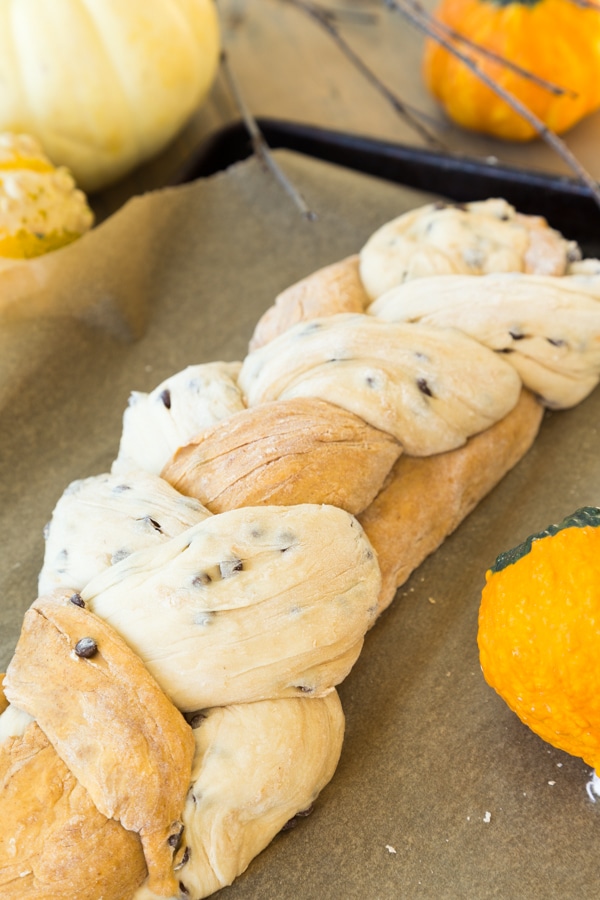
Lightly grease a baking sheet and then punch the dough down and knead for 3 minutes. Divide the chocolate chip dough into two pieces and roll into 16 to 18 inch ropes. Repeat with the pumpkin dough.
Now, place the ropes side by side, with the pumpkin in the center and braid them into one loaf. Place on the greased baking sheet, cover with a towel, and let rise for another 40 minutes.
STEP EIGHT:
Bake ion the center rack in a 350 degree oven for approximately 40 minutes, or until the bread is a light golden brown.
What to Do with Leftover Dough
This makes a large loaf of bread, and we never finish the whole loaf. Could we make a smaller loaf? Of course, but there's a method to our madness. 😉
After creating this labor of love, you don't want to just let it go to waste! Just because bread is stale, doesn't mean it's not usable. For old bread, there are a couple of go-to recipes we love to implement. Use the basics of our Vegan Eggnog French Toast recipe to make a scrumptious pumpkin bread french toast. Just replace the eggnog with almond milk! Or how about creating a pumpkin vanilla chocolate chip bread pudding? Just check back with us in a week or so for that incredible recipe!
Hopefully now you have the confidence to go out and make this impressive loaf of bread. What is your favorite Fall recipe to make? Is there anything that’s really special and only gets brought out a couple times a year?
Let’s connect! Hop on over to our Facebook page and give it a like, and follow us on Instagram and Twitter, and follow us and share this and other Veganosity recipes on Pinterest. We'd be so grateful if you did. If you like this recipe and can't wait to see what we're going to share next, subscribe to Veganosity. Just fill in the subscription box above our picture in the top right corner of the page. And, Alex and I love hearing from you, please leave a comment and let us know what you think of our recipes.
Pumpkin- Vanilla Chocolate Chip Braided Bread
Ingredients
- 1 packet dry active yeast
- 1 tablespoon sugar
- 1 ½ cups warm water
- ¼ cup granulated sugar
- 1 teaspoon salt
- 2 tablespoon pumpkin pie spice
- ½ cup pumpkin
- 3 teaspoon vanilla
- ⅓ cup chocolate chips
- 3.5 cups of bread flour with 3 tbs for counter top
Instructions
- Combine remaining sugar and flour in a large mixing bowl. Add 2 cups of flour one half cup at a time and mix until uniform. This ensures that the flour and sugar are completely combined.
- Make a well in the center of the flour and pour the yeast mixture in the well. Stir to combine and it turns into a sticky dough.
- Take one third of the dough and mix in the pumpkin, salt, pumpkin pie spice. Now continue to add one more cup of flour until the dough resembles the texture in the photograph of the dough above.
- For the remaining dough, mix in the vanilla and chocolate chips with the dough hook attachment for the stand mixer. Blend until the dough firms up, approximately 3 to 5 minutes.
- Form the pumpkin dough into ball and on well-floured surface, knead it for approximately 3 minutes, or until it's a firm solid ball. Add a bit more flour if necessary. Kneading will firm the dough up, so don't add too much more flour. Repeat with the chocolate chip dough. .
- Put the pumpkin dough and the chocolate chip dough in slightly greased bowls and cover with a towel. Let the dough rise in a warm area of your house for 40 minutes. The dough should double in size.
- Lightly grease (vegan butter works best) a long baking sheet.
- Punch the dough down and divide the chocolate chip dough into two equal pieces. Knead all three balls of dough for two minutes each and then roll into 16 to 18 inch ropes.
- Place all three ropes next to each other with the pumpkin roll in the center and braid the dough into a large loaf.
- Place the dough on the baking sheet and cover with the towel. Let rise for another 40 min.
- Preheat oven to 350°F (176°).
- Bake for approximately forty minutes, or until the bread is a light golden brown. .
Nutrition


Cadry says
Wow, this bread is absolutely stunning! I don't know which one is prettier - the braiding on the outside or seeing the color variation on the inside. You've outdone yourself!
Alex Meyer, MA says
Thank you so much! I also love the braiding and color variation. I think they really lend themselves to each other : )
Kathy Lacy says
Ok I just went back & seen instructions before the recipe! Sorry! When I downloaded the recipe into my “Copy Me That” app. None of that shows up.
Alex Meyer, MA says
Hey Kathy, No worries! Hope everything worked out for you. Let us know if you have any other questions : )
Alisa Fleming says
This bread looks lovely! I've been getting back into baking yeast breads, but do need to branch out. This flavorful braid is a great idea.
Linda Meyer says
Thank you so much, Alisa! It's such a fun thing to do on a weekend, and as you know, it makes the house smell amazing. 🙂
Vanessa Croessmann says
Saw this bread on instagram and knew I had to add it to my list of things to make. Thanks so much for your hard work of going into detail about which flour to hse and how to use it. Keep up the good work, you two! Pinning 🙂
Linda Meyer says
Thank you so much, Vanessa!! We hope you love the bread as much as we do. Keep an eye out for what to do with any extra you may have. It makes a big loaf, and we have a recipe coming soon for leftovers. 🙂
Dianne says
I've never made any kind of braided bread, because it seems too complicated, so I love how easy you've made this. It looks delicious – I can't wait to try it!
Linda Meyer says
It's so much easier than it seems. I hope you try it, and thank you!
Jenn says
Linda and Alex, this bread is gorgeous! This would be perfect for the holidays!
Linda Meyer says
Thank you, Jenn! It's definitely great for the holidays. 🙂
Christine @ Run Plant Based says
Oh wow, this looks insanely good! What a fun fall treat, thanks!
Alex Meyer, MA says
Thanks so much Christine! It actually is really fun to make, and obviously also fun to eat : )