

An easy and not dry gluten-free and vegan banana bread? Yep, I went through several different gluten-free flour combinations before finally settling on an all-purpose flour. This bread is actually as close to regular banana bread as you're going to get. So pour yourself a cup of tea and slice off a big piece and enjoy.

My future son-in-law tried this and really liked it. He said, "It tastes like bananas and doesn't have the texture of sand." LOL! Now, that may not sound like a raving endorsement, but it is, because he also said that it was really good and then proceeded to eat more.
The problem with baking with gluten-free flours, especially when you add vegan "eggs" to the mix, is that the end result can turn out really dry.
I'll never forget the first time I had a gluten-free vegan cookie at a local tea shop several years ago. I took one bite and thought that there must have been a mishap in the kitchen, because it literally had the texture of sand. It was so dry and gritty.
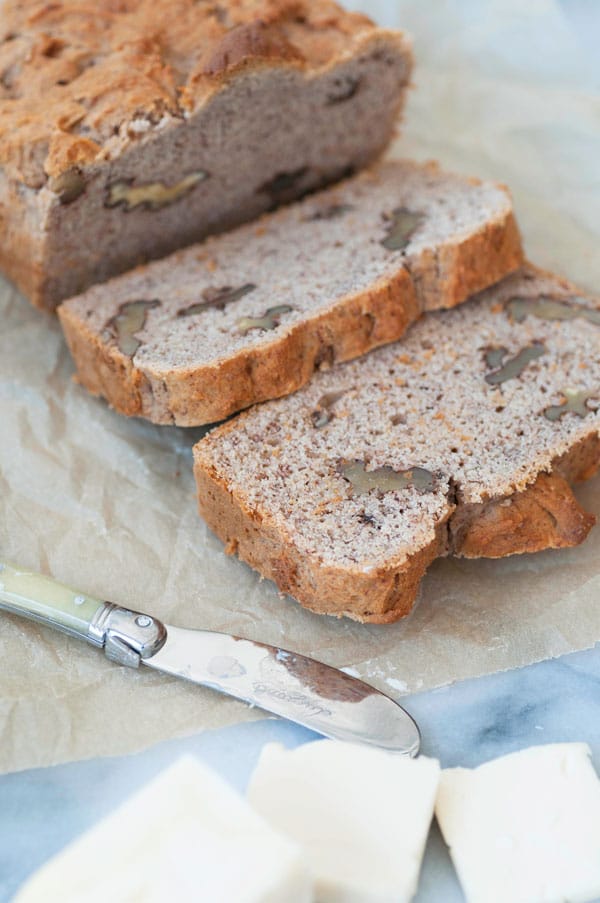
Don't get me wrong, I've had some really good gluten-free vegan baked goods, and that's why I knew that I could create a vegan and gluten-free banana bread that's tender, has a nice crumb, and isn't dry.
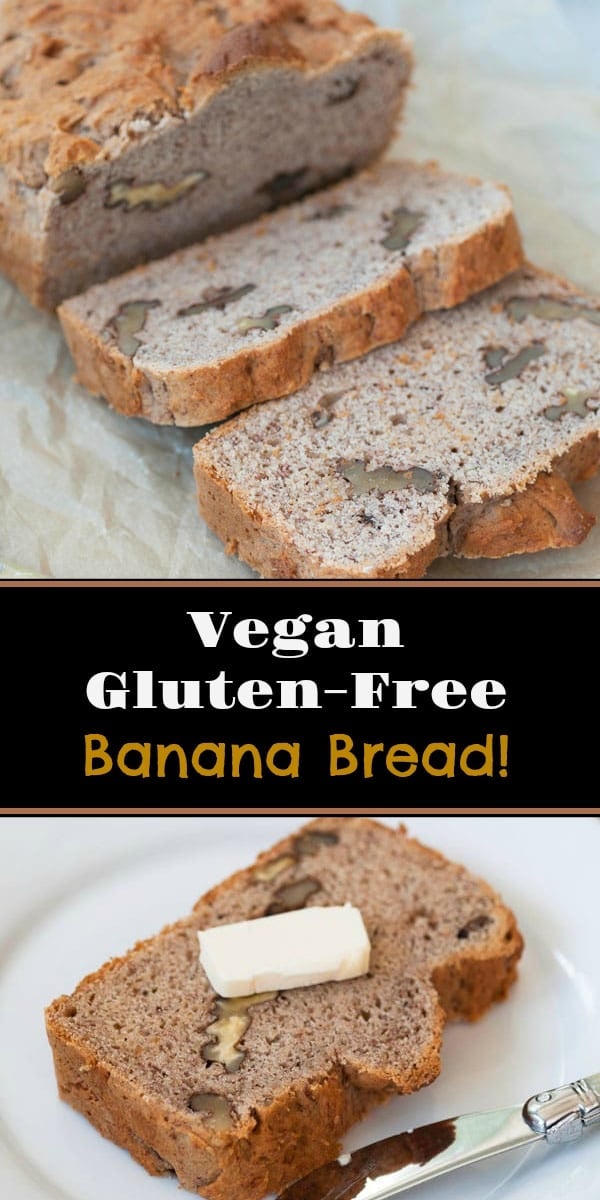
TRYING TO BAKE THE PERFECT GLUTEN-FREE VEGAN BANANA BREAD
It took me several tries to get it just right, and fortunately, the first, second and third attempts were not bad. Translation: Not bad means edible.
I tried an almond and oat flour combination, an almond flour and tapioca flour combination, a medley of all three flours, and ultimately, I used King Arthur's All-Purpose flour (this is NOT a sponsored post), and that resulted in the perfect texture.
The first three attempts either didn't rise as well as it should have, it was too crumbly, or it was too wet and just wouldn't bake to a firm bread texture.
As luck would have it, I could have saved myself a lot of time and calories by using the ready made flour. Oh well, that's the hard part of being a food blogger.
Another realization that I had while making this bread was, using coconut sugar in place of cane sugar is not always going to work. 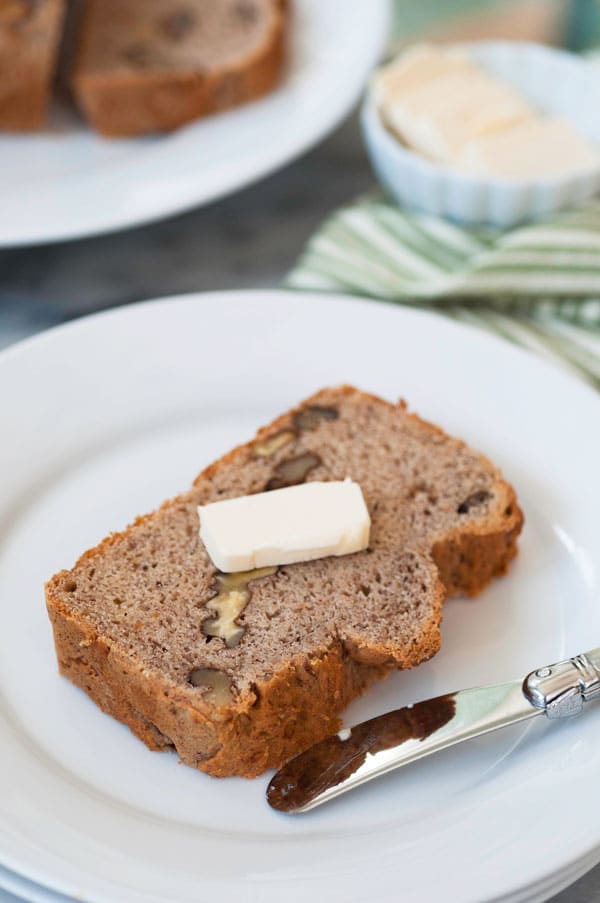
WHY CANE SUGAR IS A BETTER CHOICE FOR BAKING
I like using unrefined sugar whenever I can, however, when it comes to vegan gluten-free baking, it doesn't always yield the best results.
There is a science behind using refined sugar when it comes to baking. It creates structure and chewiness, it's a leavener, and when sugar and water molecules bond they create moisture, which prevents cakes, cookies, and breads from drying out too quickly. Coconut sugar doesn't do this, hence, one of the reasons that when you're cooking with gluten-free flours, sometimes it's best to use regular old sugar.
Now, if you eat gluten, but you don't eat refined sugar, check out our Classic Homemade Vegan Banana Bread. It's rmade with maple syrup and coconut sugar.
One more thing about the ingredients in this gluten-free banana bread, it's oil-free. We used almond butter instead of vegan butter.
Overall, this is a healthy banana bread recipe, if you can get past the ½ cup of refined sugar. I did use a ¼ cup of maple syrup to reduce the amount of white sugar.
HOW TO MAKE BANANA BREAD THAT'S GLUTEN-FREE AND VEGAN
This is a one bowl recipe! It's super easy to make, so have at it.
First - Mash the bananas in a large mixing bowl, then add the rest of the ingredients (except for the flour) and stir it all up until it's well combined.
Second - Add the flour and stir until just combined. You don't want to see any dry flour. If you need to add a bit more almond milk, do so by the tablespoon. The batter should be thick, not watery.
Third - Spoon the batter into a parchment lined bread pan and spread it evenly throughout the pan. Bake for approximately 1 hour.
Fourth - Let the bread cool in the pan for five minutes then take it out with the parchment paper and let it cool on a wire rack.
NOTE: I love walnuts in banana bread, if you do too, add a half to a whole cup to the batter before baking.
Make this and let us know what you think. We love to hear from you! And, don’t forget to take a picture of your gorgeous creation and tag us @veganosity on Instagram.
Let’s connect! Hop on over to our Facebook page and give it a like, and follow us on Instagram and Twitter, and follow us and share this and other Veganosity recipes on Pinterest. We'd be so grateful if you did. If you like this recipe and can't wait to see what we're going to share next, subscribe to Veganosity. Just fill in the subscription box above our picture in the top right corner of the page. And, Alex and I love hearing from you, please leave a comment and let us know what you think of our recipes.
PRODUCTS WE USED FOR THIS RECIPE
Vegan & Gluten-Free Banana Bread
Ingredients
- 3 very ripe bananas
- 1 tablespoon tapioca starch this is the egg replacer
- 1 tablespoon pure vanilla extract
- 1 tablespoon plus 1 teaspoon aluminum-free baking powder
- 1 teaspoon ground cinnamon
- ½ cup sugar
- ½ cup plus 2 tablespoon almond milk or any plant-based milk
- ¼ cup almond butter
- ¼ cup pure maple syrup
- 2 cups gluten-free all-purpose flour
- ½ to 1 cup walnuts optional
Instructions
- Preheat the oven to 350°F (176°C) and line a 9 x 5 x 3 inch loaf pan (23 x 13 x 7cm) bread pan with parchment paper.
- In a large mixing bowl, mash the bananas with a fork. Add the tapioca starch, vanilla, baking powder, cinnamon, sugar, almond milk, almond butter, and maple syrup and stir until well combined. Stir in the flour until just combined. You don’t want to see any dry specs of flour. The batter should be thick, not watery. If it’s too dry, add a tablespoon (15ml) of milk at a time until you get the desired texture.
- Spoon the batter into the bread pan and spread it evenly throughout. Bake for an hour, or until a long wooden toothpick comes out clean when inserted in the center.
- Let cool in the pan for five minutes and then lift out with the parchment paper and cool on a wire rack.
Notes
Nutrition
Christine @ Run Plant Based says
I pretty much like banana anything and can't wait to try this, looks amazing. Thanks!
Linda Meyer says
We hope you try it! Thank you so much, Christine!
Jennifer says
I hate bananas but I did like banana bread. Haven't had it in YEARS (since going vegan, that is)...this looks great! I wish I was a baker! But every time I try it's a disaster! LOL
Linda Meyer says
Hi Jennifer! Yeah, banana bread has a much milder flavor than raw bananas. You're too funny! I'm sure you could nail this recipe, it's pretty simple. 🙂